| Fender Flares |
|
| |
|
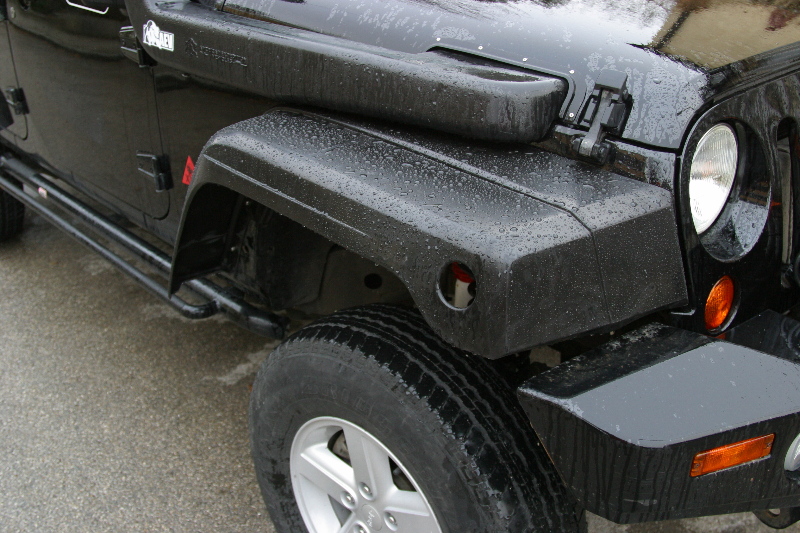
| It took me a long time to get
the tires approved by the TÜV (technical inspection). One main issue
was that the tires had to be completely covered by the flares, so I mounted
Xenon fender flares. |
|
| |
|
| There is no instructions on
how to take off the stock flares, so figuring that out is the biggest challenge.
After all, I didn't want to mess up the sheet metal. Once the inner fender
is removed, the outer pops off easily. The plastic mounting clips broke
during this process, but they are not needed any longer. |
|
| The inner fender is temporarily
put in place to be marked for trimming at the sheet metal edge. |
|
| The Xenon fender simply gets
bolted on with the provided hardware. Then the inner fender is attached. |
|
|
The rear flares get mounted
accordingly, only that the existing holes need to be drilled out slightly
and revit nuts are installed with a provided tool.
Here are the two pieces of the inner fender - the one that gets reused
and the part that ends up in the recycle bin.
|
|
| The provided tool proves a little
soft and wares out quickly. Another pair of hands is very helpful for the
installation of the revits! |
|
| Then the flares can be bolted
on. The entire installation took me about six hours. |
|